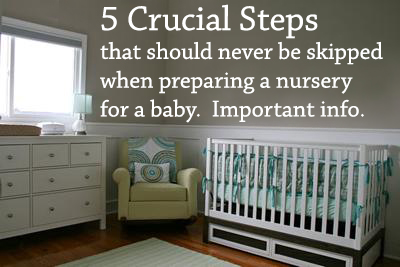
5 Crucial Steps in Preparing a Baby's Nursery
In our list, we will share 5 crucial steps in preparing a baby's nursery that should not be overlooked. In the tips, I will share what I have learned from a. personal nursery DIY projects b. listening to parents that have shared their experiences b. advice from experts whose opinion I respect and trust.
5 Crucial Steps in Preparing a Baby's Nursery
1. Never wait until the last minute to start painting the nursery! Either paint it before Mom becomes pregnant or hire someone to paint while the expectant mother is away. This is so important since the effects of painting on the developing baby are unknown. Information on the possible implications of exposure to certain types of paint during pregnancy can be found here. For safety reasons, this step in decorating the nursery should be completed as early as possible to give the paint time to "cure" and off-gas.
2. If the nursery's flooring will be replaced with carpet, do so immediately after painting or choose an option known not to compromise air quality. For practical purposes, hardwood, bamboo or tile are recommended to reduce dust and allergens as well as for being easy to clean. When using nursery area rugs to soften hard surfaces, wash them whenever possible before use and secure them to the floor using tape.
3. When buying new furniture, remove it from the boxes and assemble everything as soon as possible to allow for that "new smell" to dissipate. The same rules apply to new bedding and window treatments. Give all new furnishings and fabrics time to air since it would be ill advised to bring newborn home to a nursery filled with air that smells like chemicals.
If secondhand furniture will be used, be aware that all dropside cribs have been recalled as well as many others so research to see if the bed you have plans to use is safe. Refer to the list of current crib safety standards on this page and do your own safety check to determine that your crib passes and that all of the parts are present, in place and doing their job properly.
4. Some parents resist anchoring the baby dresser to the wall stating that it would make moving the furniture more difficult as baby grows. Experts in child-proofing advise that once baby is mobile that it is important to anchor the furniture to the wall. Safety 1st Furniture Wall Straps that currently cost less than $5 a set can help to prevent accidents.
5. Once safety issues have been addressed, we can start to plan a nursery storage system, organizing the closet to make the most out of the space available and have a place to put items that might harm baby or cause accidents out of the way.
I hope that you have found useful information in our list of tips on how to prepare the baby's nursery in 5 easy steps that you can use in your DIY project.
Thanks for visiting Unique Baby Gear Ideas.
When you click on links to various merchants on this site and make a purchase, this can result in this site earning a commission. Affiliate programs and affiliations include, but are not limited to, the eBay Partner Network and Amazon Affiliate Program such as the ones to your left on this page and others. Please see our Affiliate Disclosure page for more information.
More UBGI: Rss Feed |
Unique Baby Gear Ideas advises everyone to never use drop side baby cribs. It is illegal to buy, sell or use a drop side crib. If you own a drop side crib, please disassemble it and dispose of it at the local city or county waste dump.

Thanks for visiting!
About | Earnings Disclosure| Baby Room Ideas Blog | Site Map | Privacy Policy | Disclaimer | Affiliate Disclosure
 We are a participant in the Amazon Services LLC Associates Program, an affiliate advertising program
designed to provide a means for us to earn fees by linking to Amazon.com and affiliated sites as well as
Ebay Partner Network and others.
Contact us: info@unique-baby-gear-ideas.com
Copyright © 2006-2022. All Rights Reserved.
designed to provide a means for us to earn fees by linking to Amazon.com and affiliated sites as well as
Ebay Partner Network and others.
Contact us: info@unique-baby-gear-ideas.com
Copyright © 2006-2022. All Rights Reserved.
New! Comments
I would love to know what you think of our site! Leave me a comment in the box below.